Step 2 - Register and deliver source code
Overview
This page explains how to create an application in CAST Imaging and deliver its source code ready for analysis. It is intended for application owners and CAST Imaging operators. An initial scan of the delivered code is initiated allowing the code to be inspected (size, structure etc.) for completeness, source code filters (exclusions) to be defined and any “additional options” such as automatic extension installation, activation of Security Dataflow analysis etc. can be enabled.
Before you start
| Requirement | Detail |
|---|---|
| Role | Administrator, Application Owner |
| Source code | Available as a ZIP archive or stored in a folder defined via a source folder location. |
| Assessment | Optional. If you are unsure the application is a good candidate, assess it with CAST Profiler before you register it. |
Step 1 - Create the application
- Open CAST Imaging and navigate to the landing page
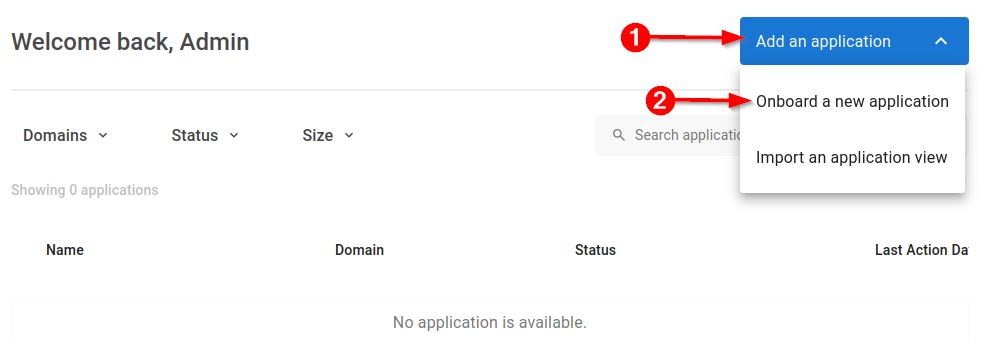
- Click Add an application > Onboard a new application
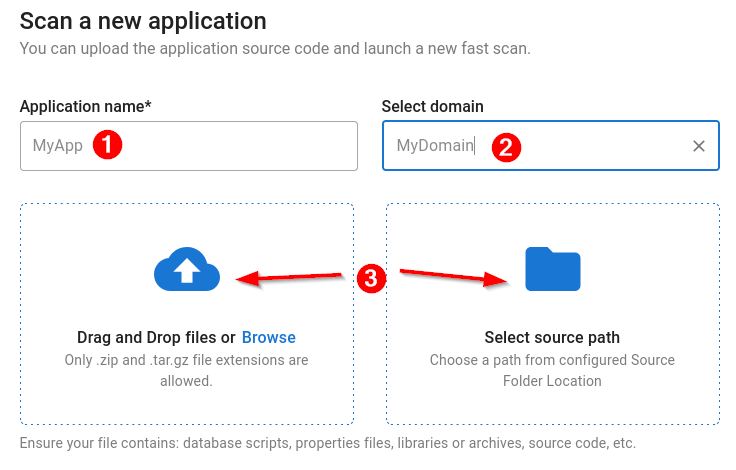
- Enter a name and optional domain, then choose how you are delivering your source code (archived ZIP or source folder location):
Step 2 - Run a fast scan
Run a fast scan to verify that CAST Imaging can read the codebase and identify the technologies present before committing to a full analysis
The fast scan runs inside CAST Imaging against the code you have delivered, and is part of onboarding every application. It is not the same as CAST Profiler, which you run on your own machine beforehand to decide whether to onboard the application at all. Running Profiler first does not replace this step.
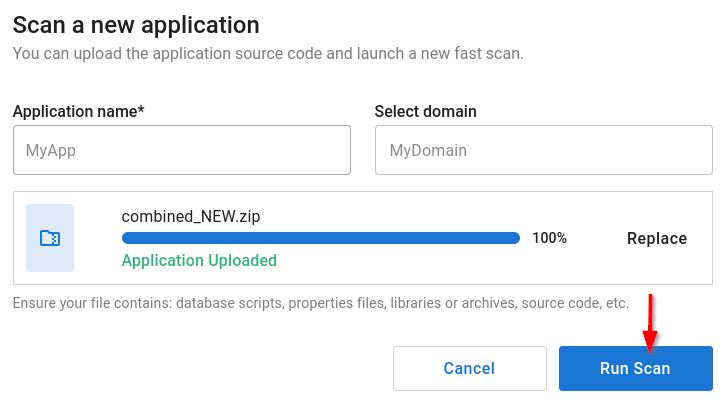
- Click Run scan.
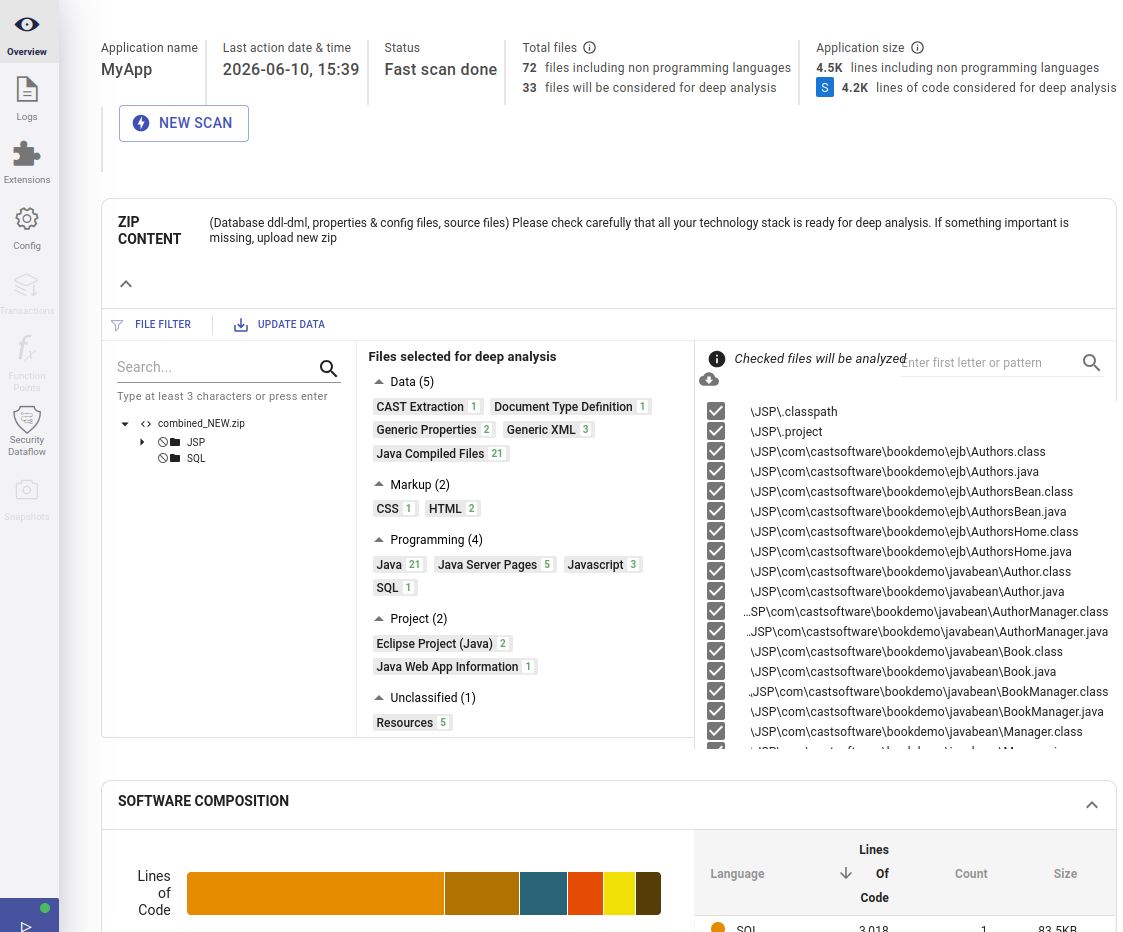
- Review the scan results to confirm technology detection is correct and apply any exclusions or additional configuration - see Application analysis configuration - Overview:
If the fast scan reports unexpected technologies or missing files, check the delivery path and credentials before proceeding.